In a previous post, we talked about safety in surfski and why we should never set itaside. Today I want to continue along that line and talk about something that, for me, is a fundamental part of any starting line to the sea: checking the forecast before starting to paddle.
Looking outside the window or to be misled by how things look isn’t enough. To sail with safety (and truly enjoy it) the key is to know what wind we are going to come encounter, where it comes from, what the sea is like and in which direction the waves are moving.
Over the years I’ve tried a lot of webs and apps, and even though none of them is perfect, there are some that worked well for me, specially in the Canary Islands and in the peninsula. In this post I’ll talk about which ones I use, what information matters and how I interpret that information before deciding if it’s a good day to do downwind… or I better stay on shore.
What information to look (and why it matters to understand it well)
When I check an app or a web to see the sea conditions for today, I focus on mainly three aspects: the wind strength, wind direction and sea strength. These are, for me, the most important factors to decide if I sail or not, and where.
An important detail, many times overlooked, is that not every platform shows the information using the same unit. For the wind, you can find it in knots, kilometers per hour or meters per second. And it’s not the same thing to read “10” in each of them:
- 10 knots: 18.5 km/h = 5.1m/s
- 15 knots are already more than 27 km/h… and in surfski that makes the difference
Understanding well these units will help you avoid interpretation mistakes, unnecessary scares, and will help you make better decisions when you plan your downwind trainings or routes.
The same thing happens with the sea strength, that is usually expressed by two key data:
- Wave height (in meters)
- Period (in seconds)
The period shows time between waves. The longer it is, the more organized and powerful the waves will be. For example, a sea of 1,5 m of height and 13 seconds of period is much more powerful than a sea of 2 m and only 6 seconds.
My two trusted apps
After trying a lot of platforms over the years, at the end I chose two that, in my experience, work very well in the environment that I train and work, specially in Gran Canaria and in mainland Spain.
- To check the wind, the one that I use the most is Windy.
- To have a clearer vision of the sea and waves conditions, I use Windguru.
I alternate between each to compare information and make sure that it make sense. If the values don’t differ a lot between each, I start trusting them. There is no perfect app, but these two gave me very good results quite steadily. With the free version of both, is enough.
How I use Windy to know if there will be downwind
Windy is the app that I most use when I want to know if the wind will be favorable or not. It’s very useful for me to choose if the day will be okay to do downwind, or I better stay paddling in another place. It’s intuitive, very trustworthy (at least in Gran Canaria or in the peninsula) and shows everything at one glance.
1. Select the area where you’re going to paddle
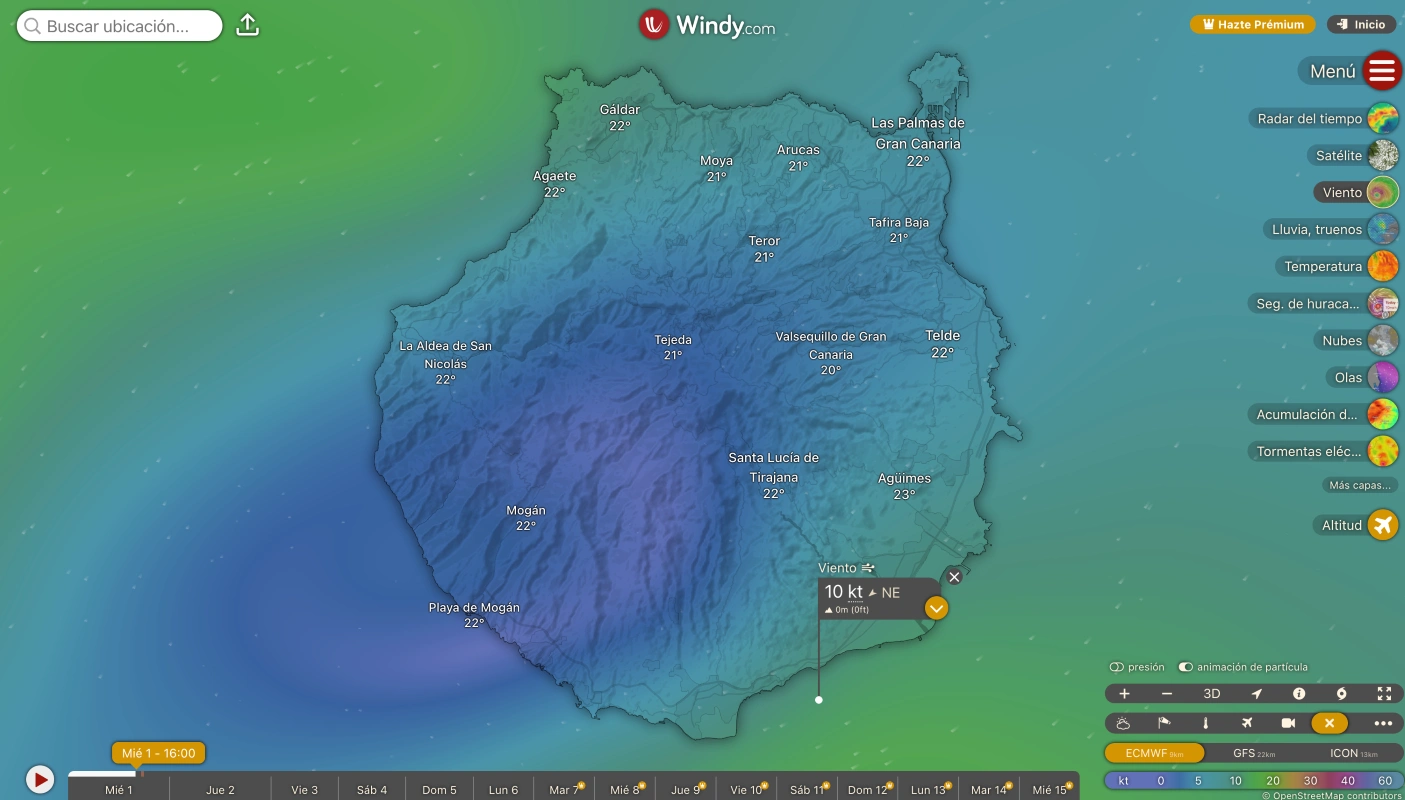
The first thing I do is open the Windy app or website and look for the specific area where I want to paddle. In my case, Gran Canaria. Once on the map, I locate the part of the island where I plan to paddle, whether it’s for training, doing a downwind, or just going out to enjoy the sea.
2. Interpret the wind colors
Windy shows wind intensity using a range of colors, from light blue (completely calm) to deep red (very strong wind).
- Very light blue: no wind
- Green: light wind
- Yellow: moderate wind
- Orange or red: strong or very strong wind
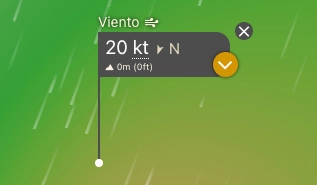
This gives you a quick idea of the conditions. If you have doubts, you can click on a specific area, and a small flag will pop up with the exact data, for example, “10 knots from the northeast.” Here, the key is to be clear about the unit of measurement, because as mentioned earlier, 10 km/h is not the same as 10 knots.
3. Switch layers to see other factors
One of Windy’s advantages is that it doesn’t just show the wind, it also provides many other information layers that can help refine your forecast:
- Waves: Same color system. Lighter blue = calm sea, dark blue = bigger waves. You can also see the wave period and direction by clicking on the point you’re interested in.
- Clouds: If there are a lot, the wind forecast may vary a bit, since cloud cover can influence the actual wind behavior. So if you see lots of clouds, the wind information might be less reliable.
- Rain: When a storm with rain moves in, the wind can shift abruptly. In areas like Gran Canaria, rain pushes a lot of air and can create unexpected situations.
How I use Windguru to assess sea conditions
Although Windy works great for checking wind, when I want a clearer picture of the sea and waves conditions, I usually turn to Windguru. I find it a very visual and easy-to-read tool, especially when comparing what I see there with other sources.
1. Search for the spot you’re interested in
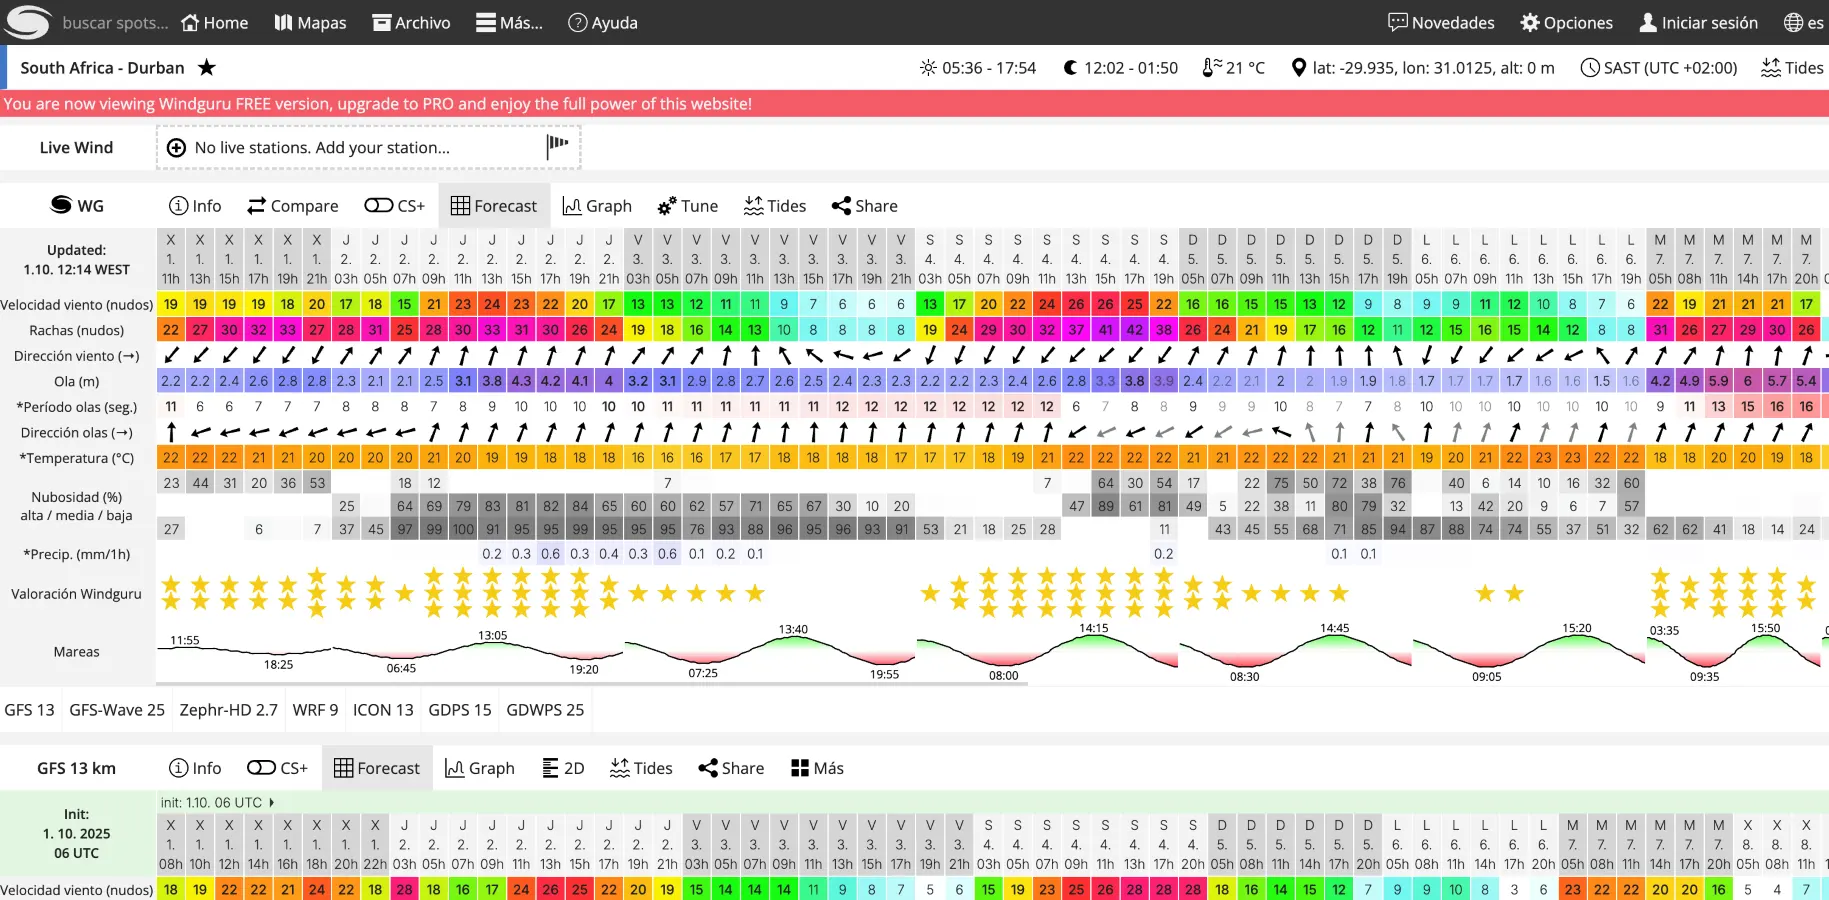
Go to windguru.cz and select the specific spot where you’re going to paddle. You can search by name or browse the map until you find it. In this case, we’ll use Durban, since it’s an area with lots of surfski activity and provides a very complete forecast, showing a full range of colors on the screen.
2. Compare with Windy: wind gusts and direction
One thing I like to do is compare Windguru’s data with Windy’s, especially the wind gust speed and direction. If the data is similar, it makes me trust that the forecast is reliable. If there’s a big difference, I think twice before going out.
3. Check wave height, period, and direction
But the main reason I use Windguru, is for ocean information. I focus mainly on three things:
- Wave height (in meters)
- Period (in seconds)
- Direction the waves are coming from
That last one is key. For example, the forecast might show 4.3 meter waves (which is massive for surfski), but if you’re paddling on the east coast and those waves are coming from the southwest, you’ll probably don’t notice them. On the other hand, if the direction matches your paddling area, you’ll definitely feel it.
That’s why it’s not enough to just check wave size, you also have to look at the period (the higher it is, the more energy the waves carry) and their direction relative to your position. That way, you can anticipate whether you’ll have a clean, cross, or messy sea.
What kind of downwind can I expect? A practical case with Windy
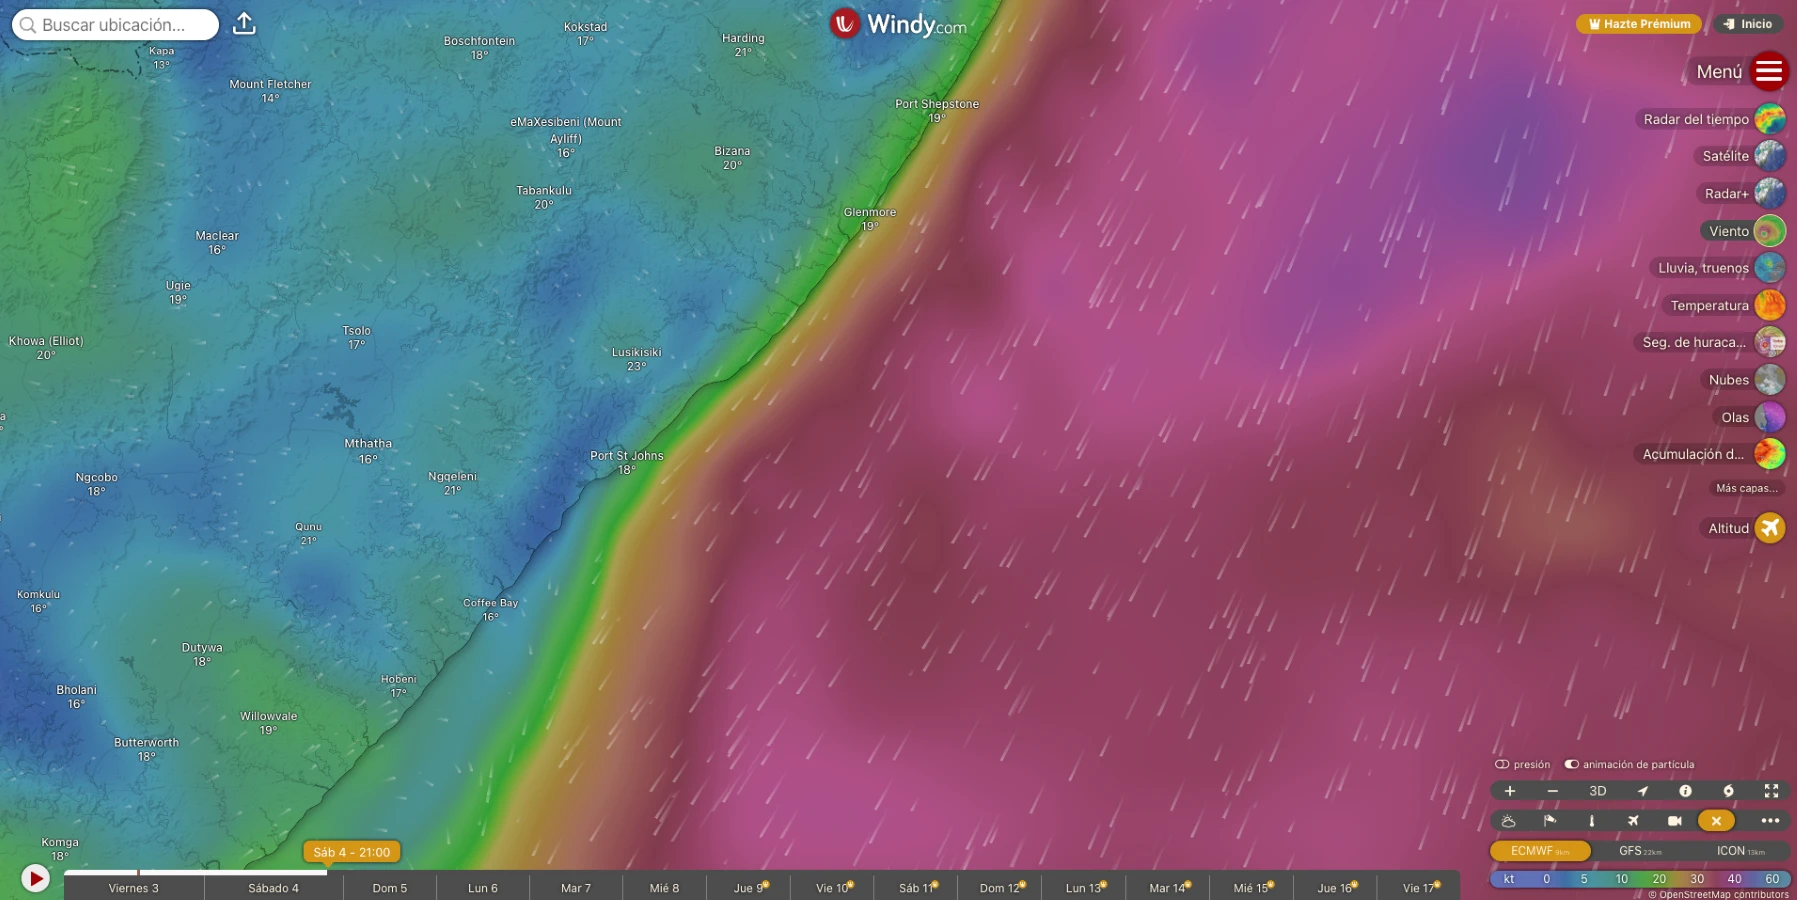
To better explain how I interpret wind conditions, let’s look at a real screenshot from Durban (South Africa), an area with a strong surfski tradition, where Windy’s full color range is clearly visible, from total calm to strong wind.
In this image, we can see how wind intensity increases sharply as we move away from the coast. Based on these colors, I usually classify conditions like this:
No downwind (0–7 knots)
Very light colors, almost no movement. There won’t be enough wind to push the canoe, time to paddle hard without help.
Light downwind (8–13 knots)
Blue-green and light green tones. You can start to feel some wind, and a gentle downwind becomes possible, perfect for beginners or enjoying the session.
Moderate downwind (13–16 knots)
Deeper green. The wind starts pushing well, and waves begin to form regularly. This is where the fun starts.
Strong downwind (16–22 knots)
Yellow and orange tones appear. The sea gets serious: waves break, the wind pushes you hard, and paddling requires skill, focus, and fitness.
Very strong downwind (22+ knots)
Deep orange or red. These conditions are dangerous and not for everyone. They require experience, control of your equipment, and good knowledge of the area. The margin for error is minimal.
This kind of reading isn’t an exact science, but it really helps you make informed decisions before going out. As I always say: it’s better to understand the forecast well… than to be surprised out there.
Know your environment: the forecast isn’t everything
To finish, I’d like to share an advice I find essential: know the area where you’re going to paddle.
Because honestly, checking apps and forecasts is of little use if you don’t understand how the wind behaves in the specific area you’ll be in.
Here’s a real example: in Gran Canaria, where I live and train, the forecast might show 11 knots from the northeast (a gentle breeze, manageable for most people), but when that wind hits the island’s terrain, with peaks reaching almost 2,000 meters, local accelerations can turn those 11 knots into 25. And that completely changes the conditions.
That’s why it’s key not just to read the forecast but also to understand how the wind and sea behave in your area, if there are currents, thermal accelerations, wind shadows, or exposed zones. That local knowledge is what will help you make safe and smart decisions.
And now we’re at it, a quick checklist before heading out:
- Check the forecast and understand what it says.
- Make sure conditions match your level.
- Plan your route, including escape points.
- Tell someone where you’ll be, and go with company if possible.
- And if you’re unsure… better to leave it for another day.